CUSTOMERS
DESCRIPTION: Customers is used to set up and update information for all customer accounts that will be sent invoices or regular cash receipts.
To access: Click on the Customers module  then click the Customers menu item.
 ![]()
The following windows will appear:

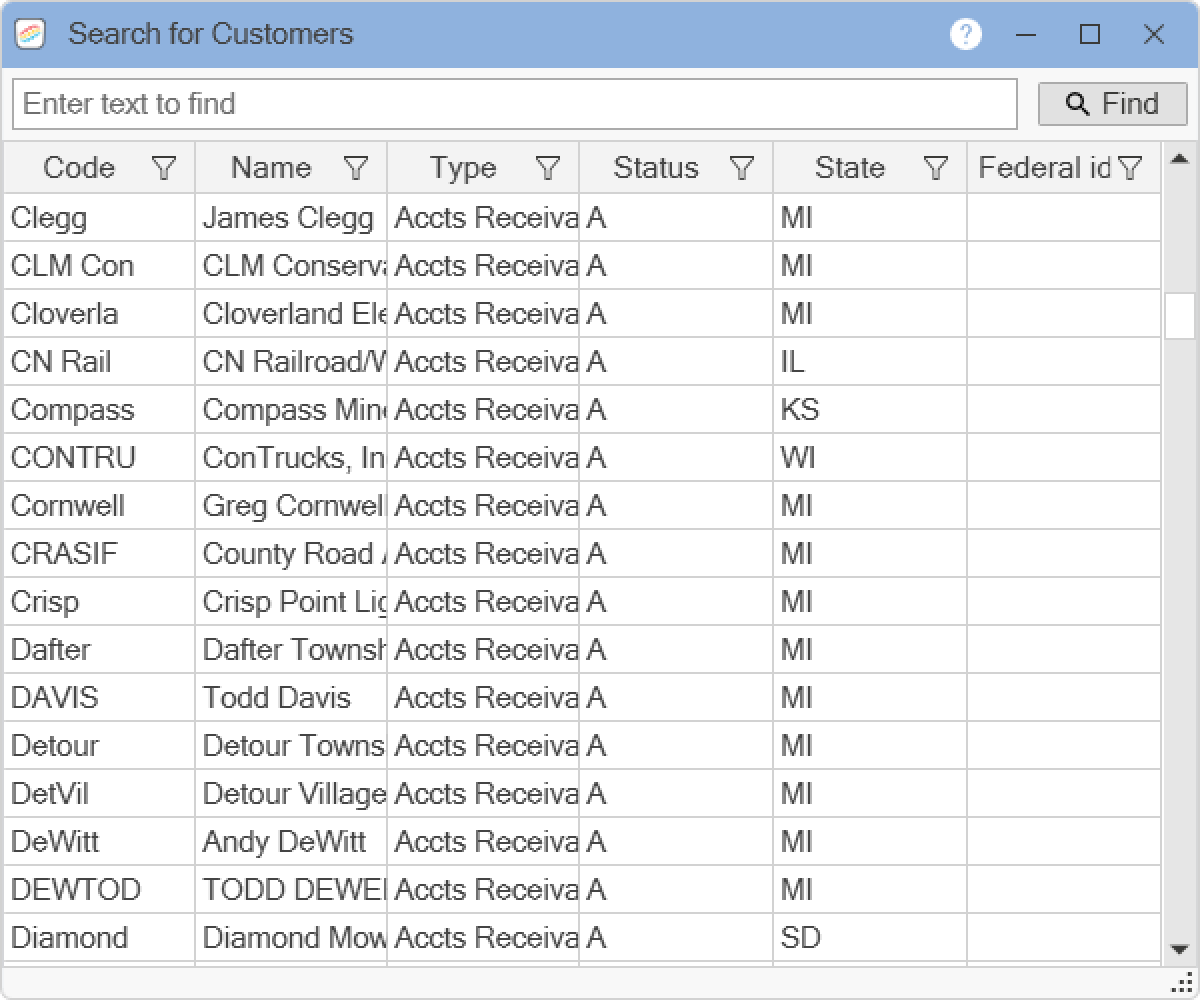
Please see the following topic for help on setting up filters ![]() in the search grid: Exploring Grid Filters
in the search grid: Exploring Grid Filters
At the top of the window there is a tool bar which contains common functions for each employee. The tool bar buttons have hot key functionality, and you can see the key combination for each button by hovering your cursor over the button.
The following is a list of the hot key combinations:
Search: Alt-E
Save: Alt-S
Add New: Alt-N
Cancel Add: Alt-C
Delete: Alt-D
Refresh: Alt-R
Document Management: Alt-O
First: Alt-HOME
Previous: Alt-LEFT Arrow
Next: Alt-RIGHT Arrow
Last: Alt-END
If you are adding a New customer, click the New button  at the top of the window. Enter a unique customer Code with a maximum of eight characters. Then enter the customer's Name. Enter the Status from the drop down list.
In the General Tab, add the general contact information - the Address, Phone number, Email address, and Fax number. Select the Customer type (Accts Receivable or Cash Receipting) from the drop down list.
To add a specific contact, click on the Click here to add a new row button in the Contacts grid.
In the Accounting Tab, the following window will appear:
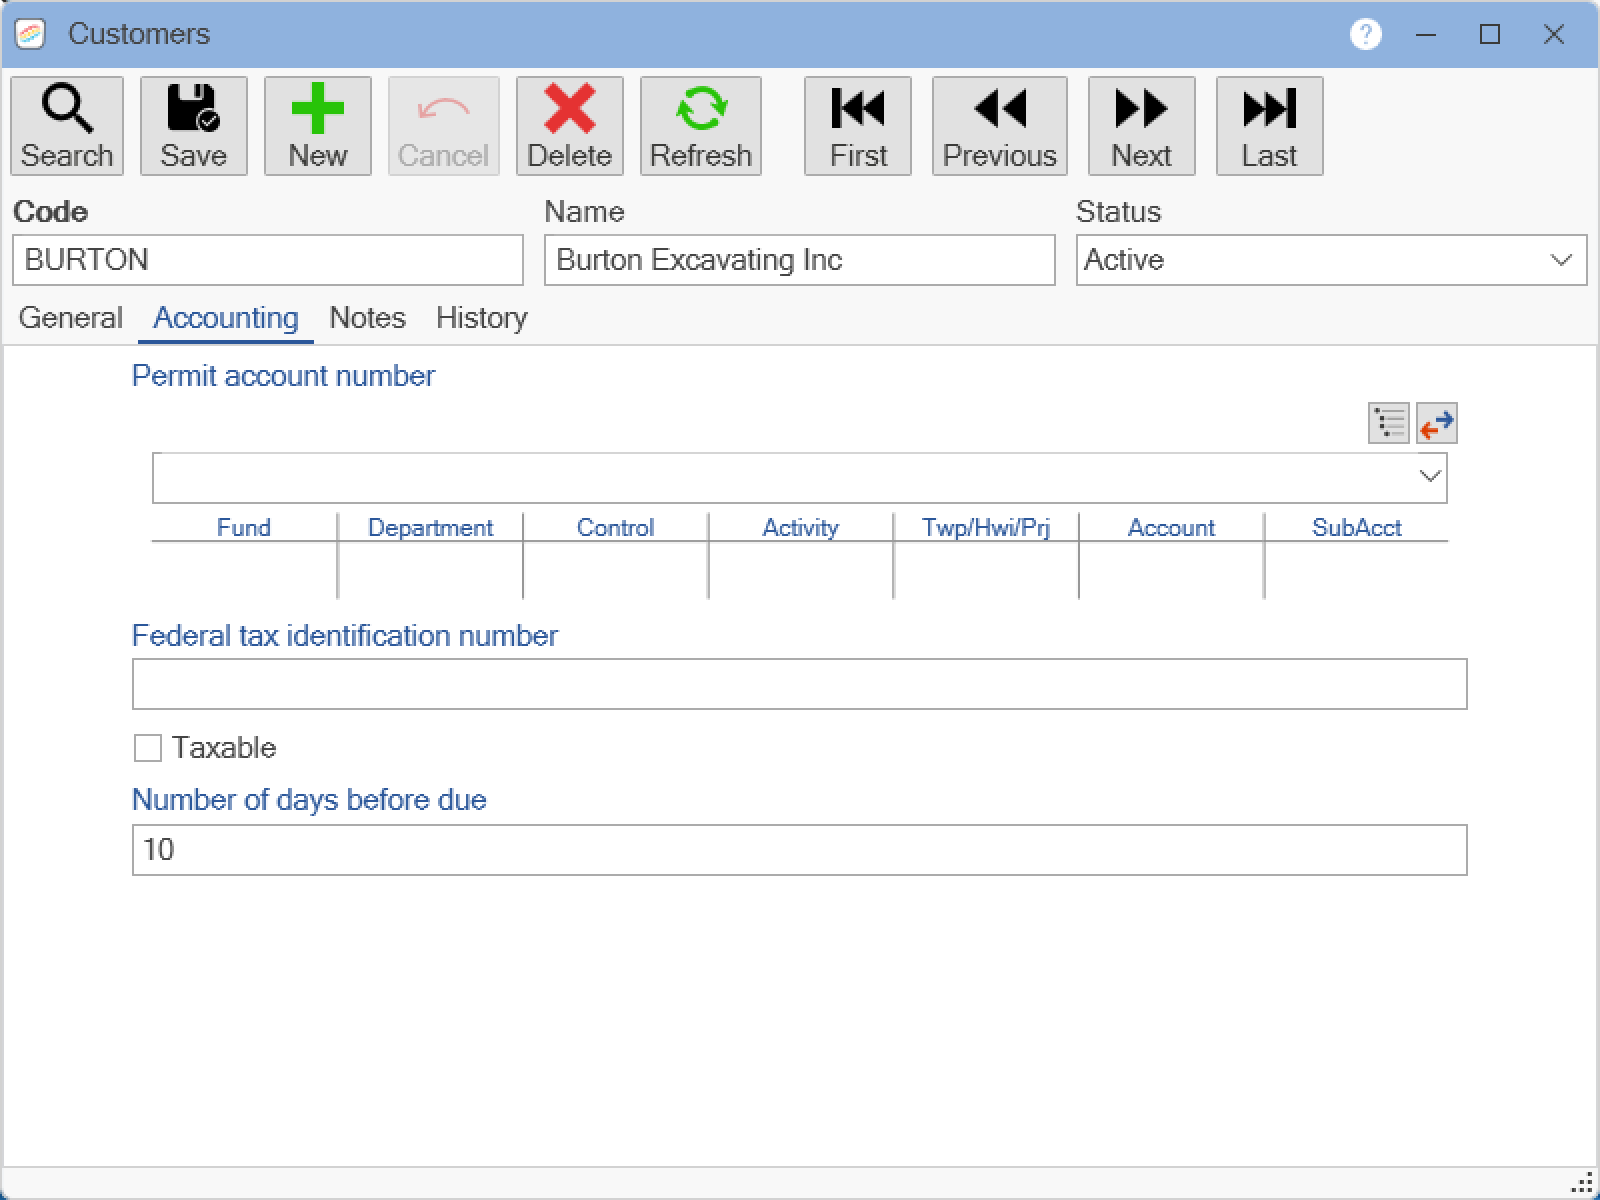
You can select a Permit account number from the drop down list. Enter the Federal tax identification number. Check the Taxable box if the customer requires sales tax to be calculated. You can also enter a default Number of days before an invoice is due.
There is a Notes Tab to make additional comments relating to the customer.
The History Tab shows a transaction history and current balance.
When you are finished entering all the information, click the Save button. ![]() A success message will appear. Click OK.
A success message will appear. Click OK.
If you are making changes to an existing customer account, use the Search window to find the customer and make any changes. Then click the Save ![]() button. A success message window will appear. Click OK. If you are making changes to multiple accounts, you can use the Navigation buttons
button. A success message window will appear. Click OK. If you are making changes to multiple accounts, you can use the Navigation buttons .png) to move to the next account on the search list.
to move to the next account on the search list.
If you need to delete a customer, select that customer from the search window list and click the Delete button. ![]() A message asking if you are sure you want to delete the selected item will appear. Click Yes. However, a customer cannot be deleted if the account is currently being used by Pro Fund Accounting. To indicate you no longer need to post invoices for them, mark their Status as Inactive.
A message asking if you are sure you want to delete the selected item will appear. Click Yes. However, a customer cannot be deleted if the account is currently being used by Pro Fund Accounting. To indicate you no longer need to post invoices for them, mark their Status as Inactive.
Please see the following topic for help with Document Management ![]() : Document Management
: Document Management
Click on the X in the upper right corner of the window to close the window.